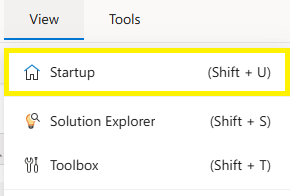
Startup
The Startup menu is designed to provide the user with quick access to common tasks such as creating a new project, opening existing projects, and importing projects from files.
Startup
The Startup screen allows users to create, import, or open projects using shortcuts to frequently used actions.
Overview
The Startup screen is the landing page of Synergy IDE. It provides quick access to the following essential operations:
Create a new blank project
Create a project from a template
Import a project from file
Open an existing project
Each button launches the corresponding modal or wizard interface.
Quick Actions
Create New Blank Project
Launches a modal to define and create a completely new project from scratch.
New Blank Project
The NewBlankProject dialog allows users to initialize a brand-new project from scratch. The user defines key identifiers and selects where the project will be stored.
Actions
Create:Validates inputs and creates the new project in the selected location.Cancel:Cancels the operation and closes the dialog without saving any changes.
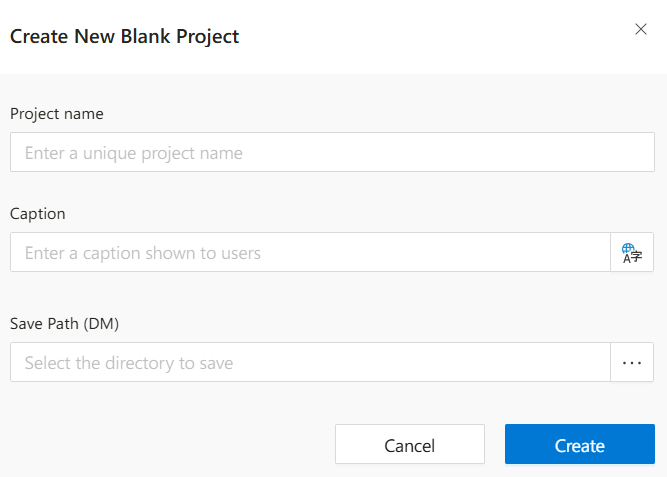
Notes
- Project names must be unique and follow naming conventions defined by system administrators.
- A valid save path is required to ensure project data is stored in the correct structure.
- Translation support for the title field allows defining names in multiple languages if needed.
Create Project From Template
Opens a screen to choose from categorized use-case templates.
What is "Create Project From Template"?
The Create Project From Template feature in Synergy IDE allows users to initialize a new project using curated templates categorized by department, purpose, or function. It helps teams start fast without designing from scratch.
Templates include built-in flows, forms, and configurations, allowing for immediate productivity.
Steps to Create a Project
The creation wizard consists of 9 steps, each focusing on a different configuration area:
Target– Define the project name, folder path, and target environment.Analyze– Preview included content and project structure.DM– Configure document management integration.Connection– Map system connections.HR– Assign personnel, roles, and HR objects.Form– Review and adjust form elements.Flow– Set up logic and process flows.PAT– Manage permissions and access control.Create Project– Finalize and generate the new project.
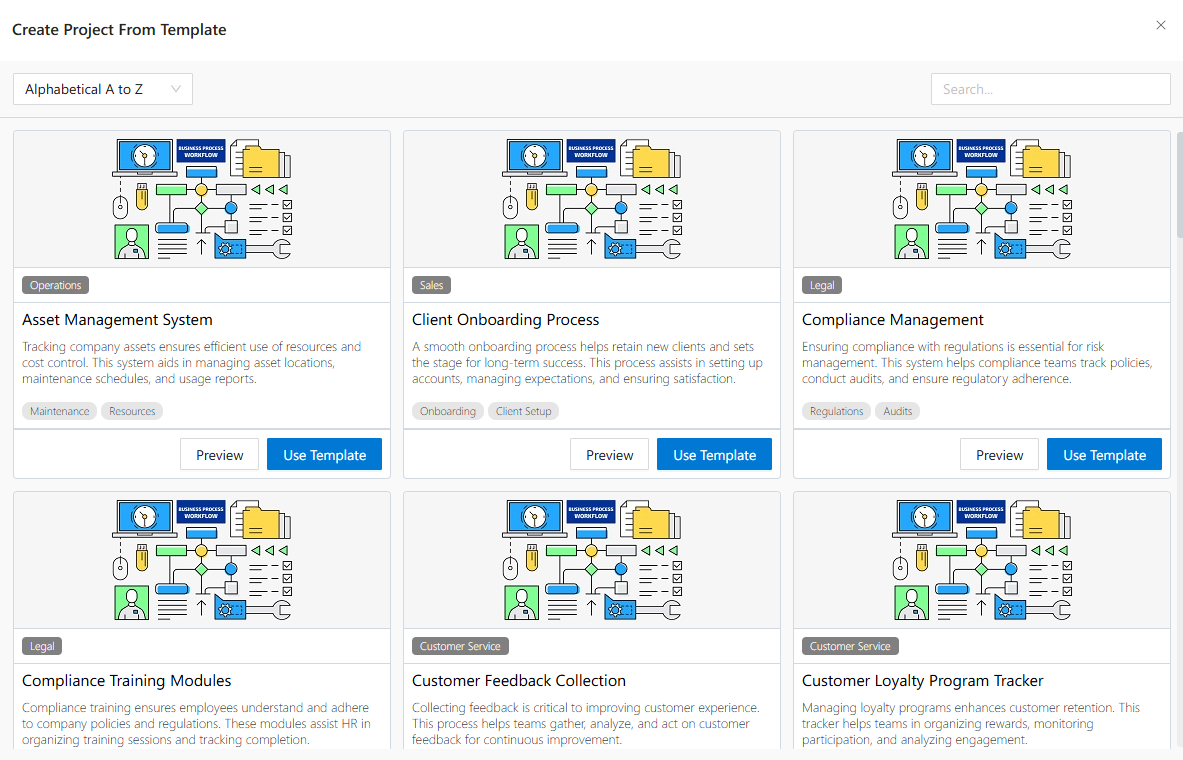
Step 1: Choose a Template
Start by browsing available templates on the Startup screen or under the File > Create Project From Template menu.
Each template card includes:
Template title and description
Business domain tags
Buttons for Preview and Use Template
Preview opens a documentation view describing the template contents, tools used, and implementation notes.
Use Template opens the project wizard prefilled with the selected structure.
Use Cases
- Quickly spin up reusable projects across departments.
- Build new solutions based on internal standards.
- Reduce onboarding time for new developers or analysts.
Best Practices
- Preview templates to ensure they align with your needs.
- Customize values like name/path before creating the project.
- Use the wizard steps to fine-tune flow, connection, and access configuration.
Import Project From File
Starts a step-by-step wizard to import previously saved projects.
What is "Import Project From File"?
The Import Project From File feature in Synergy IDE allows users to bring in previously exported projects and set them up quickly in their current workspace. It supports import from both local computer and document management.
This wizard is especially useful when transferring solutions between environments (e.g., test → production), restoring backups, or working with externally prepared projects.
Steps to Import a Project
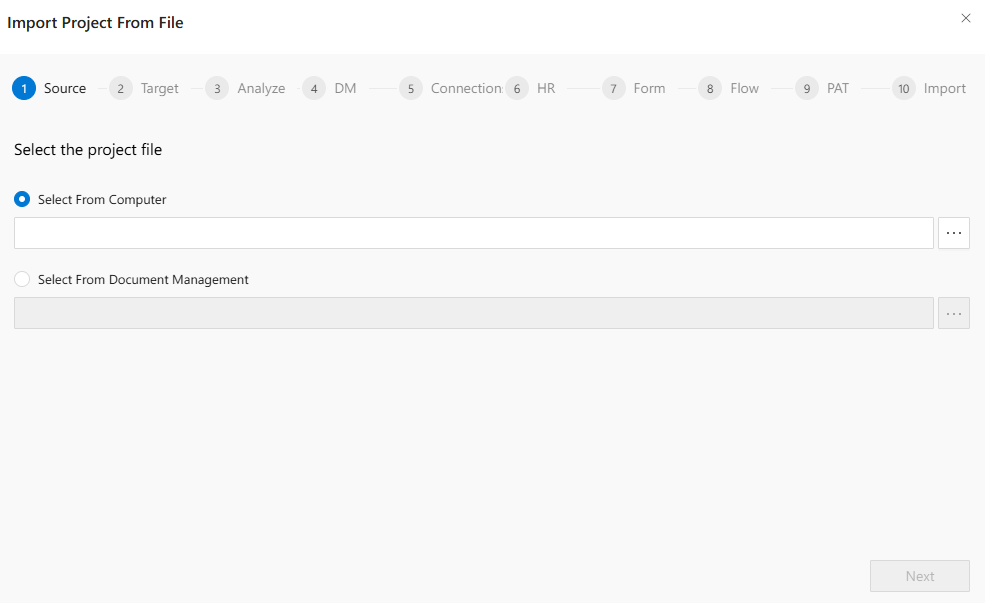
The wizard consists of 10 clearly labeled steps to guide you through a successful project import:
- Source – Choose the file source.
- Target – Define where the project will be placed.
- Analyze – Review the contents of the project.
- DM – (Optional) Handle document management settings.
- Connection – Map external system connections.
- HR – Configure human resources-related settings.
- Form – Import and validate forms.
- Flow – Handle process flows and automation.
- PAT – Configure permissions and access tokens.
- Import – Finalize and deploy the imported project.
Step 1: Select the Project File
You can start by selecting the project file using one of two options:
-
Select From Computer
Choose a.zipfile stored locally on your device. Click the three dots (...) to open your file browser. -
Select From Document Management
#import(DeveloperGuides.IDE.Modals.SelectFolder)
Once you’ve selected a valid file, click Next to proceed.
Use Cases
- Migrate a project from a test environment to live production.
- Restore a previously backed-up project file.
- Share pre-built form and workflow sets across teams.
Best Practices
- Always review each step of the wizard to ensure compatibility (especially connections and flow logic).
- Validate the version of the imported project matches your current IDE release.
- Use consistent naming and path structures to avoid confusion or conflicts.
Open an Existing Project
Displays a searchable list of all accessible projects in the workspace.
What is "Open Existing Project"?
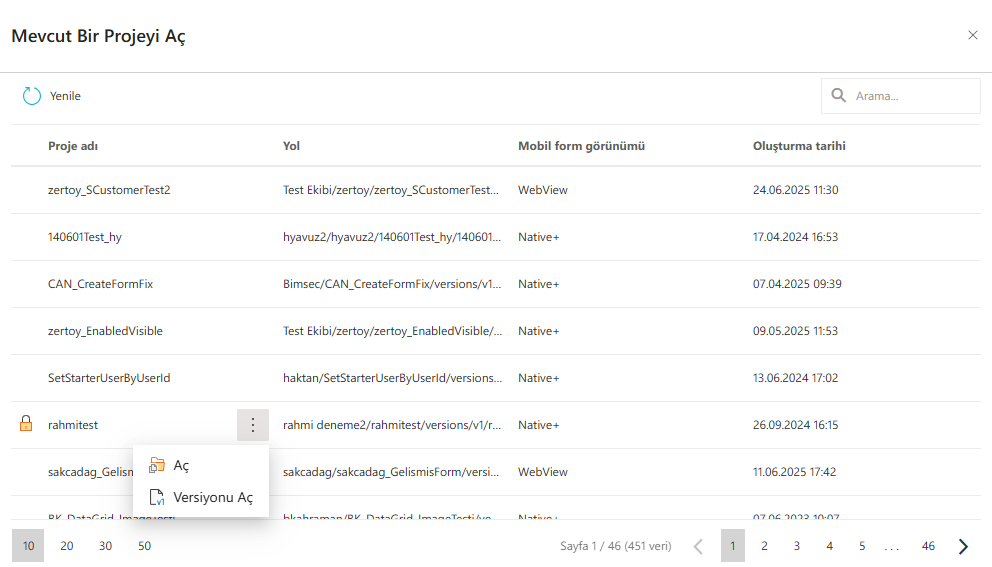
The Open Existing Project modal in Synergy IDE allows users to browse and reopen any previously created or imported projects. This interface provides a searchable and sortable table of all accessible projects.
It is ideal for quickly switching between projects or resuming work from where you left off.
Features of the Project List
The table displays the following details for each project:
Project Name– The name given during project creation.Path– The folder or directory where the project is stored.Mobile View Mode– Indicates the project's mobile interface compatibility (e.g.,WebView,Native+).Created Date– The date and time when the project was created.Context Menu (⋮)– Click the three-dot icon next to a project to access the following actions:Open: Opens the selected project for editing.Open Version: Allows selecting and opening a specific version of the project.
Pagination– Navigate through the list using the controls at the bottom.
Use Cases
- Quickly resume work on a current project.
- Access archived or backed-up projects for reference.
- Open an older version of a project for comparison or rollback.
Best Practices
- Use meaningful project names for easy searching and identification.
- Protect sensitive projects with proper permissions in shared environments.
- Be cautious when opening previous versions to avoid overwriting newer changes.
See Also
- Import Project From File
- Create Project From Template
- Create New Blank Project
- Import Project From File
FAQs
- What Are the Required Fields for Creating a New Project?
- How Can I Sort Project Templates?
- Can I Create a Project from a Template?
- How Can I Search for a Template?
- What is the Purpose of the Project Transfer Wizard?
- What is the IDE Startup Tab?